The Best Builds for Monster Hunter: World‘s End Game

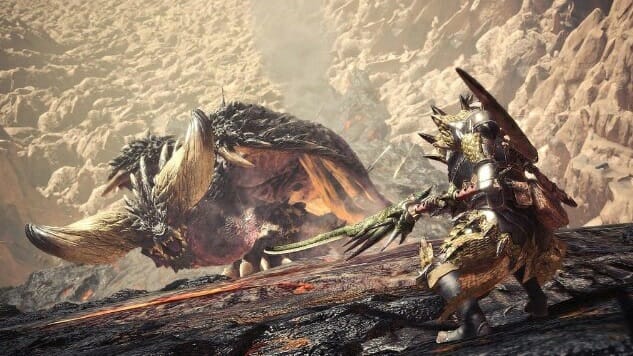
When it comes to successfully slaying the creatures of Monster Hunter: World, preparation is key. To make your hunts go smoother, you should first make sure that your gear is up to speed, and your weapon of choice will have a big impact on how you choose between each of the game’s many different armor pieces and themed weapons. These decisions might not seem all that important to begin with, but your loadout will become much more important after you defeat the final monster and unlock the wealth of extra content in the end game.
To give you a helping hand, we’ve cobbled together a suggested build for each of the 14 weapon types, from which you can freely alter and change to suit your own preferences and needs. It’s important to note however that these builds are never set in stone and almost all of them can be tweaked to better suit either your own playstyle or to help counter a particularly nasty monster with a specific weakness. Try to think of them as a template that highlights a specific niche role or strength that you can take advantage of when playing with your own weapon of choice. There may also be recommendations for several high tier jewels that you’re unlikely to find lying around until much later in the game, so be sure to slot in any useful jewels you do have while you work towards acquiring the ones you want as this will help you to understand and customize your sets later on.
Sword and Shield
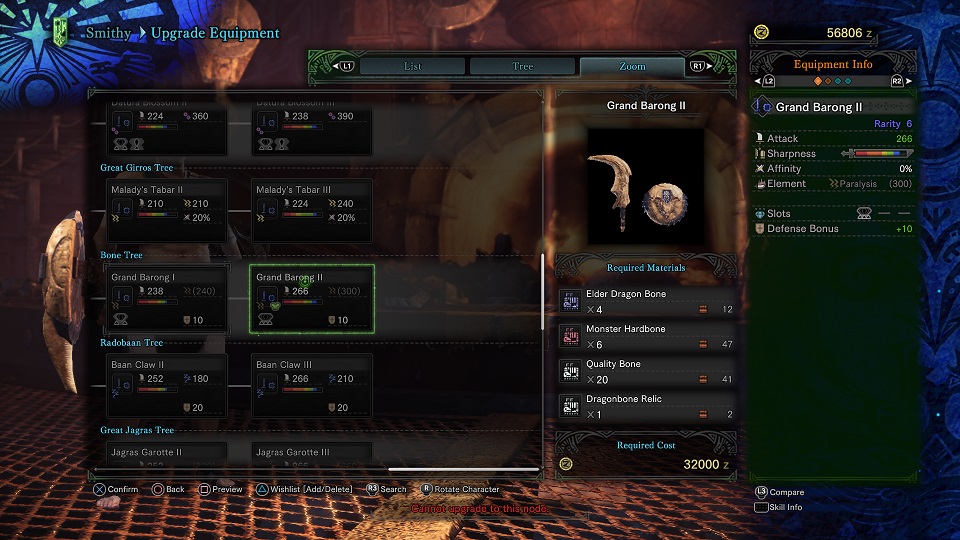
The Sword and Shield (commonly referred to as the SnS) paints itself as a fairly vanilla weapon, but the reality is that this mundane looking combo brings a fairly powerful niche to the monster slaying table. while it may not do much damage per hit, the SnS is great at attacking rapidly and many users take advantage of this to apply status effects to help control and subdue the monster, allowing slower weapons to align their attacks with more precision. The SnS is also the only weapon that allows you to use consumables while having your weapon drawn, so there are a few popular builds that take advantage of this combined with the Wide Range skill to run a team-wide support build for multiplayer sessions. Given its sharp rise in popularity, we’re going to go with the support build for now.
For this set you should aim for:
Weapon—Grand Barong 2 (Gobbler jewel slotted)
Helm—Mosswine a
Chest—Rath Soul b (Friendship jewel slotted)
Arms—Dober b (2x Friendship jewels slotted)
Waist—Tzitzi a
Legs—Kirin b (2x Speed Eating)
Charm—Immobilize III
Thanks to the maxed out Wide Range and Speed Eating skills, with this setup we can hope to achieve a fairly effective build that revolves around using consumables to help buff and heal you and your team members, keeping everyone healthy and in the fight for as long as possible. This build also boasts a decent chance to apply paralysis to monsters too thanks to the Free Elem skill from the chest and legs, which is then also boosted by the Immobilize charm. You could try slotting a Satiated jewel into the weapon if you feel like you’re burning through your potions and items too fast, as it activates fairly regularly, but this will ultimately come down to personal preference.
Greatsword
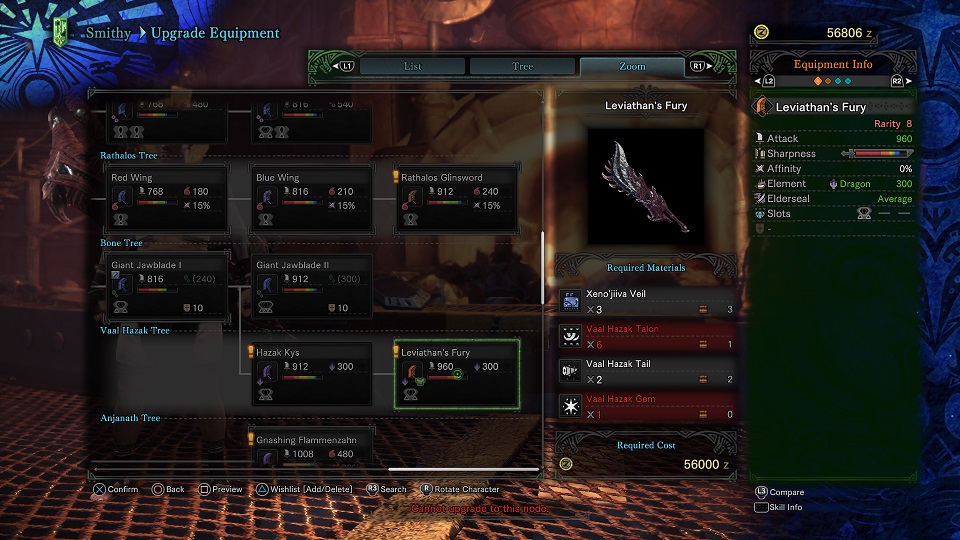
The meaty blade of the Monster Hunter series, Greatswords are slow but powerful with their large sweeping strikes and long windup attacks. Many people prefer to focus on dealing damage over anything else with this behemoth of a blade, which is understandable given how much damage each strike can dish out, and with a little tweaking those numbers can easily be pushed above and beyond standard limits. There are a lot of theories surrounding the “best greatsword” build right now, with many arguing for or against the use of skills like Crit Draw, a fan favorite from previous games. Ultimately, due to a number of changes to the way the greatsword now deals out damage, the number crunchers out there have concluded that this is no longer viable, with many instead choosing to focus on boosting raw attack damage so let’s use that as a starting point.
For this set you should aim for:
Weapon—Leviathan’s Fury
Helm—Dragonking Eyepatch a (Critical Boost Jewel slotted)
Chest—Damascus b (3x Gobbler Jewels slotted)
Arms—Kaiser b (Critical Boost Jewel slotted)
Waist—Nergigante b (Fast Charge Jewel slotted)
Legs—Dober b (Sheath Jewel slotted)
Charm—Attack Charm III
The overall gist of this set is all about dishing out high numbers consistently, which is why we see boosts to critical damage here and there. We also see some quality of life improvements with the aid of Speed Eating and Sheath, since time spent healing is time you could be spending hitting the monster. Since the attacks take a fair amount of time per swing, it might also be an idea to swap this set around a bit to sacrifice some damage for the sake of getting max earplugs into the equation, as monster roars can regularly interrupt your combo and stand between you and the higher damage output you’re looking for.
Longsword
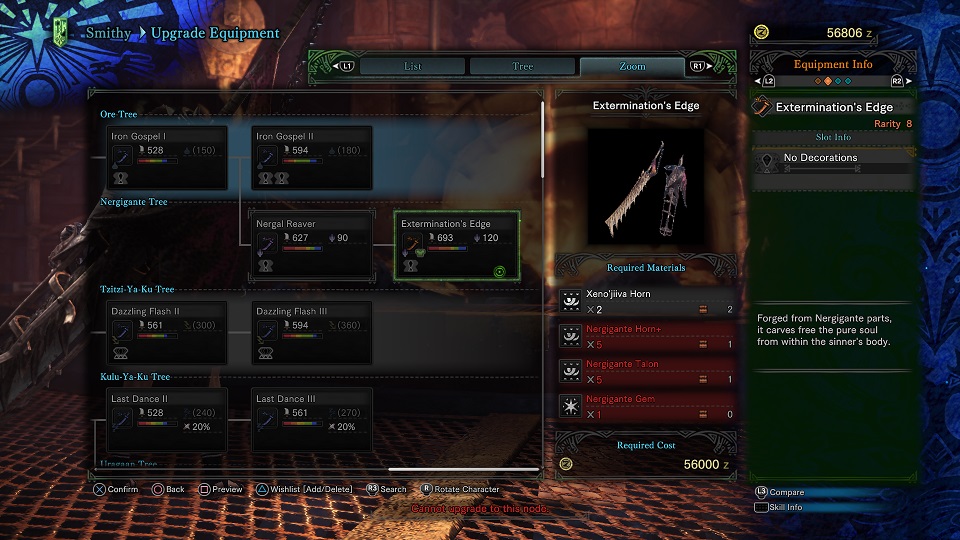
Sitting somewhere between the rapid speed of the Dual Blades and the long windups of the Greatsword, the Longsword predominantly serves as a damage dealing weapon with a reliable attack pattern causing a moderate amount of damage. Along with the typical focus on cranking up the numbers when it comes to damage output, the Longsword is great for getting those important tail slices, and as such is usually expected to focus on the back end of most monsters where possible. As with most of these builds, the Longsword does offer some flexibility when deciding what skills to amplify, but for the sake of ease we’ll be looking at something that tries to keep you in the fray for longer while pushing out respectable damage numbers.
For this set you should aim for:
Weapon—Extermination’s Edge
Helm—Nergigante a (Attack Jewel 1 slotted)
Chest—Kushala b (Critical Boost Jewel 2 slotted)
Arms—Teostra a (Attack Boost Jewel 1 slotted)
Waist—Nergigante b (Critical Boost Jewel 2)
Legs—Nergigante b (Tenderizer Jewel 2 slotted)
Charm—Handicraft III
The important takeaway from this build is that you’re trying to maximize the damage you do by keeping your sharpness up, while also amplifying those attack and critical damage numbers. Thanks to the Nergigante set bonus, you also get Hasten Recovery which will help to keep your health topped up as your continue to attack your enemy. Since some of these jewels are quite hard to come by, you can always replace the Handicraft Charm III with an Attack Charm III just to make sure that you’re still able to pump out decent damage numbers, although this will come at the cost of having to sharpen a few more times per fight.
Lance
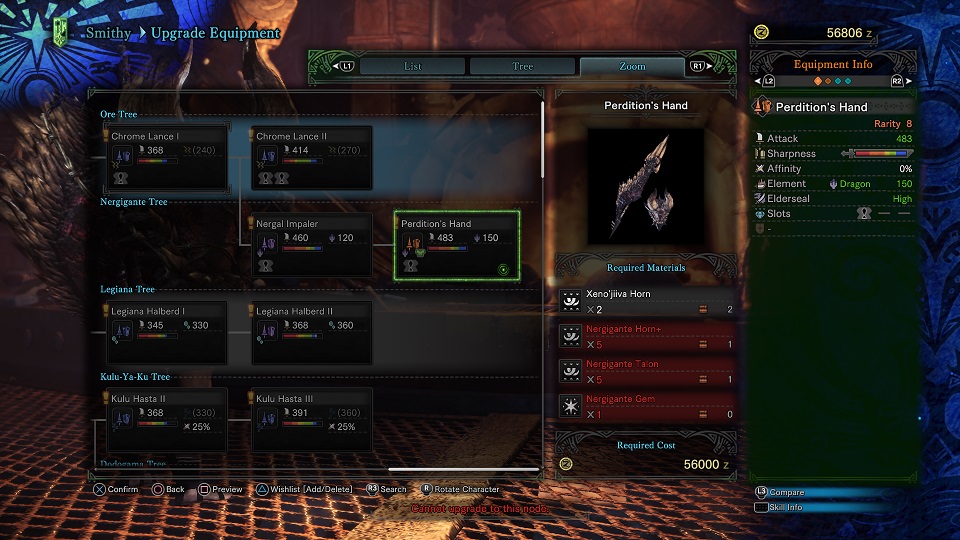
The aim of the game for Lance users is almost always focused on defense. Since the weapon itself isn’t all that great for dishing out damage, many people have learned to utilize the shield to allow for some fairly impressive damage mitigation, with the potential to fully negate attacks like Xeno’Jiiva’s crystal laser beams if you build it right. With that in mind, we’ll be starting with something tanky and durable as a base, but with enough potential and flexibility for you to alter and tweak as you see fit.
For this set you should aim for:
Weapon—Perdition’s Hand
Helm—Dragonking Eyepatch a
Chest—Uragaan a
Arms—Kaiser a
Waist—Uragaan b
Legs—Uragaan a
Charm—Ironside Charm III
With this combination alone, we’re already looking at a level five Guard skill, significantly reducing any staggers and stamina consumption when blocking. We also get the important Uragaan set bonus Guard Up, which allows you to to block unblockable attacks. I’ve not recommended any extra jewels here simply because the set alone provides enough to help you fulfil your main goals as a Lance user, so anything extra you slot in can be done to help you improve and amplify other areas like damage and utility.
Gunlance
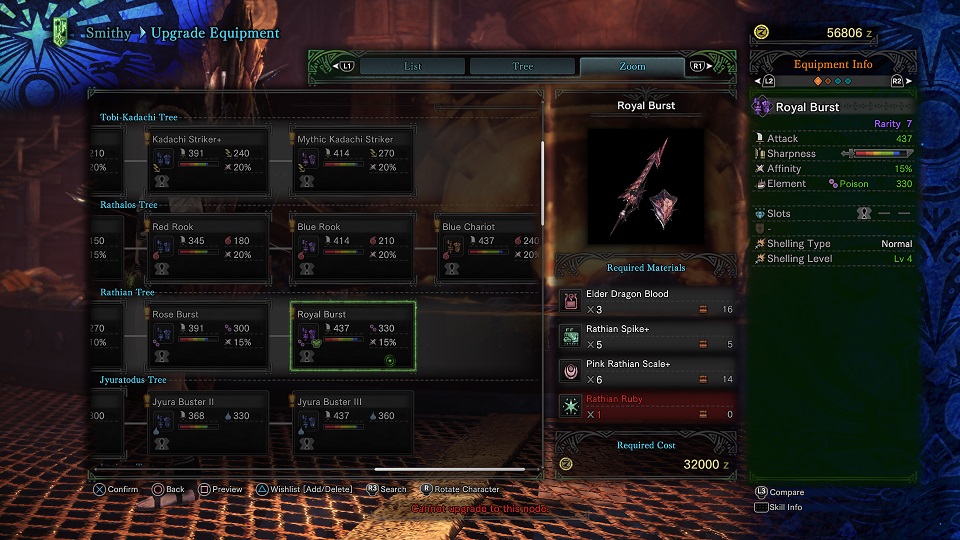
The Gunlance tows the line between damage and defense, often allowing for some impressive feats for those willing to wrap their head around its complex system of blasts and shells. There’s a big focus on building your Gunlance armor set and skills around the actual lance you take with you, so for that reason I’ll be turning to the incredibly effective build put together by Gunlance user Canta Per Me which focuses on making the most of those high numbers through repeated shelling.
For this set you should aim for:
Weapon—Royal Burst (Venom Jewel 1 slotted)
Helm—Odogaron b (Tenderizer Jewel 2 slotted)
Chest—Odogaron b (Venom Jewel 1 slotted)
Arms—Odogaron a
Waist—Odogaron a
Legs—Dodogama b (Venom Jewel 1 slotted)
Charm—Artillery Charm III
Not only does this give you both set bonuses from the Odogaron armor, helping to extend sharpness while also giving you stun on the first attack after unsheathing, this set also works to amplify the poison attributes of the Royal Burst Rathalos weapon. When combined with the Rocksteady Mantle, you can expect to see some serious and reliable damage numbers pumping out of a set like this, and you can always swap out the three Venom Jewels if you ever want to swap elements to exploit another monsters’ weakness.
Insect Glaive
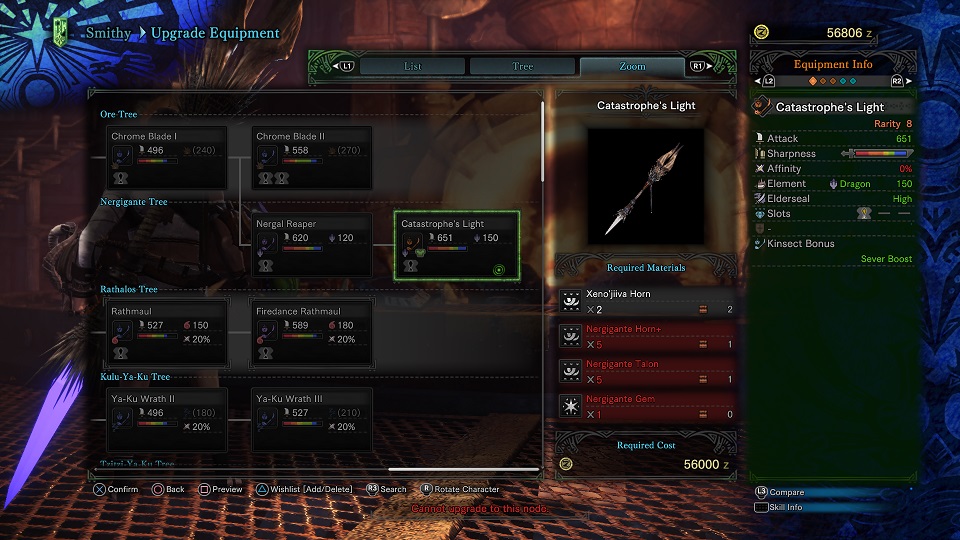
With its fantastic scope for mobility and mounting, the Insect Glaive (or IG for short) may look cool but many within the larger community often see it as more of a gimmick, and it’s not hard to see why given that most IG users can often be seen flying aimlessly through the air in an attempt to flail at the monster’s loftier regions. The important thing to understand about IG is that it is one of the most modular and flexible weapons out there, offering you a number of mix and match combinations between the glaive and the kinsect to help you pair specific elements and statuses to great effect. To that end, we’ll try to focus on a build that gives you a great foundation for armor pieces, so that you can freely alter your kinsect and glaive at will to better suit the task at hand.
For this set you should aim for:
Weapon—Catastrophe’s Light (Expert Jewel 1 slotted)
Kinsect—Pseudocath III
Helm—Dragonking Eyepatch a
Chest—Odogaron b
Arms—Odogaron a
Waist—Odogaron a
Legs—Odogaron b
Charm—Attack Charm III
Here we see a fairly basic build that centres on the Odogaron bonuses that help keep your sharpness up. I’ve deliberately left out a number of jewels here simply because you can use those empty slots to flex in and out on Attack and Crit boosting skills as you see fit, but since you have access to a number of areas other weapon types don’t, and almost all weak spots will be within your reach thanks to the wide range of the glaive and your vault ability, the potential to stack affinity for high critical damage is there if you want it.

-

-
-
-
-
-
-
-
-
-
-
-
-
-
-
-
-
-
-
-
-
-
-
-
-
-
-
-
-
-
-
-
-
-
-
-
-
-
-
-